"Imagebutton" Save/Load Slots Tutorial
"Imagebuttons" as Save/Load slots
Hello, everyone! Today I'd like to show you how I got various buttons to work as Save/Load slots. This is my first tutorial, but I hope I will be clear and straight to the point with my explanation.
Why is imagebuttons in quote?
As I was writing this tutorial I realized it is less of an imagebutton but more of a button that uses an image. Imagebutton (in my opinion) are easier to set up, but this will take a little bit more work than a regular imagebutton. But it is still a fairly simple process!
IMPORTANT: Please make sure you're working in an empty project. This is to make sure none of the code below potentially breaks your game.
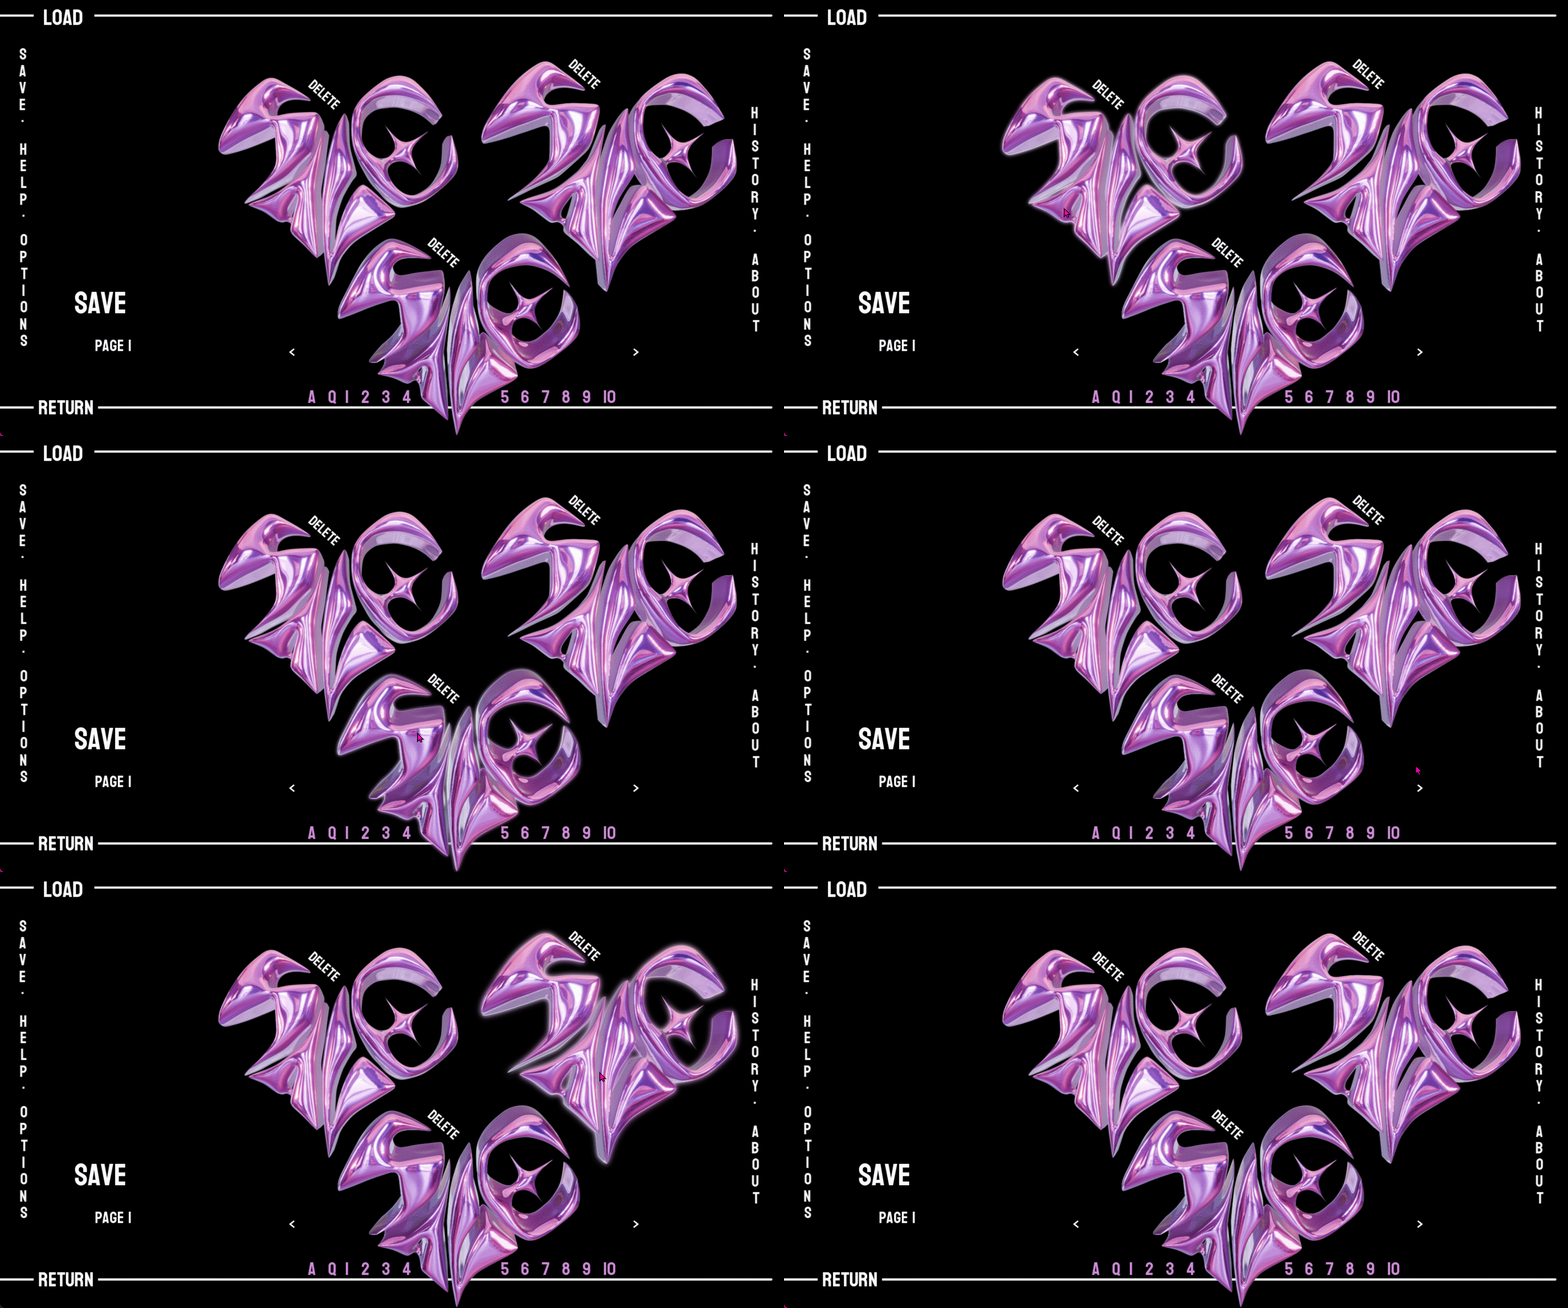
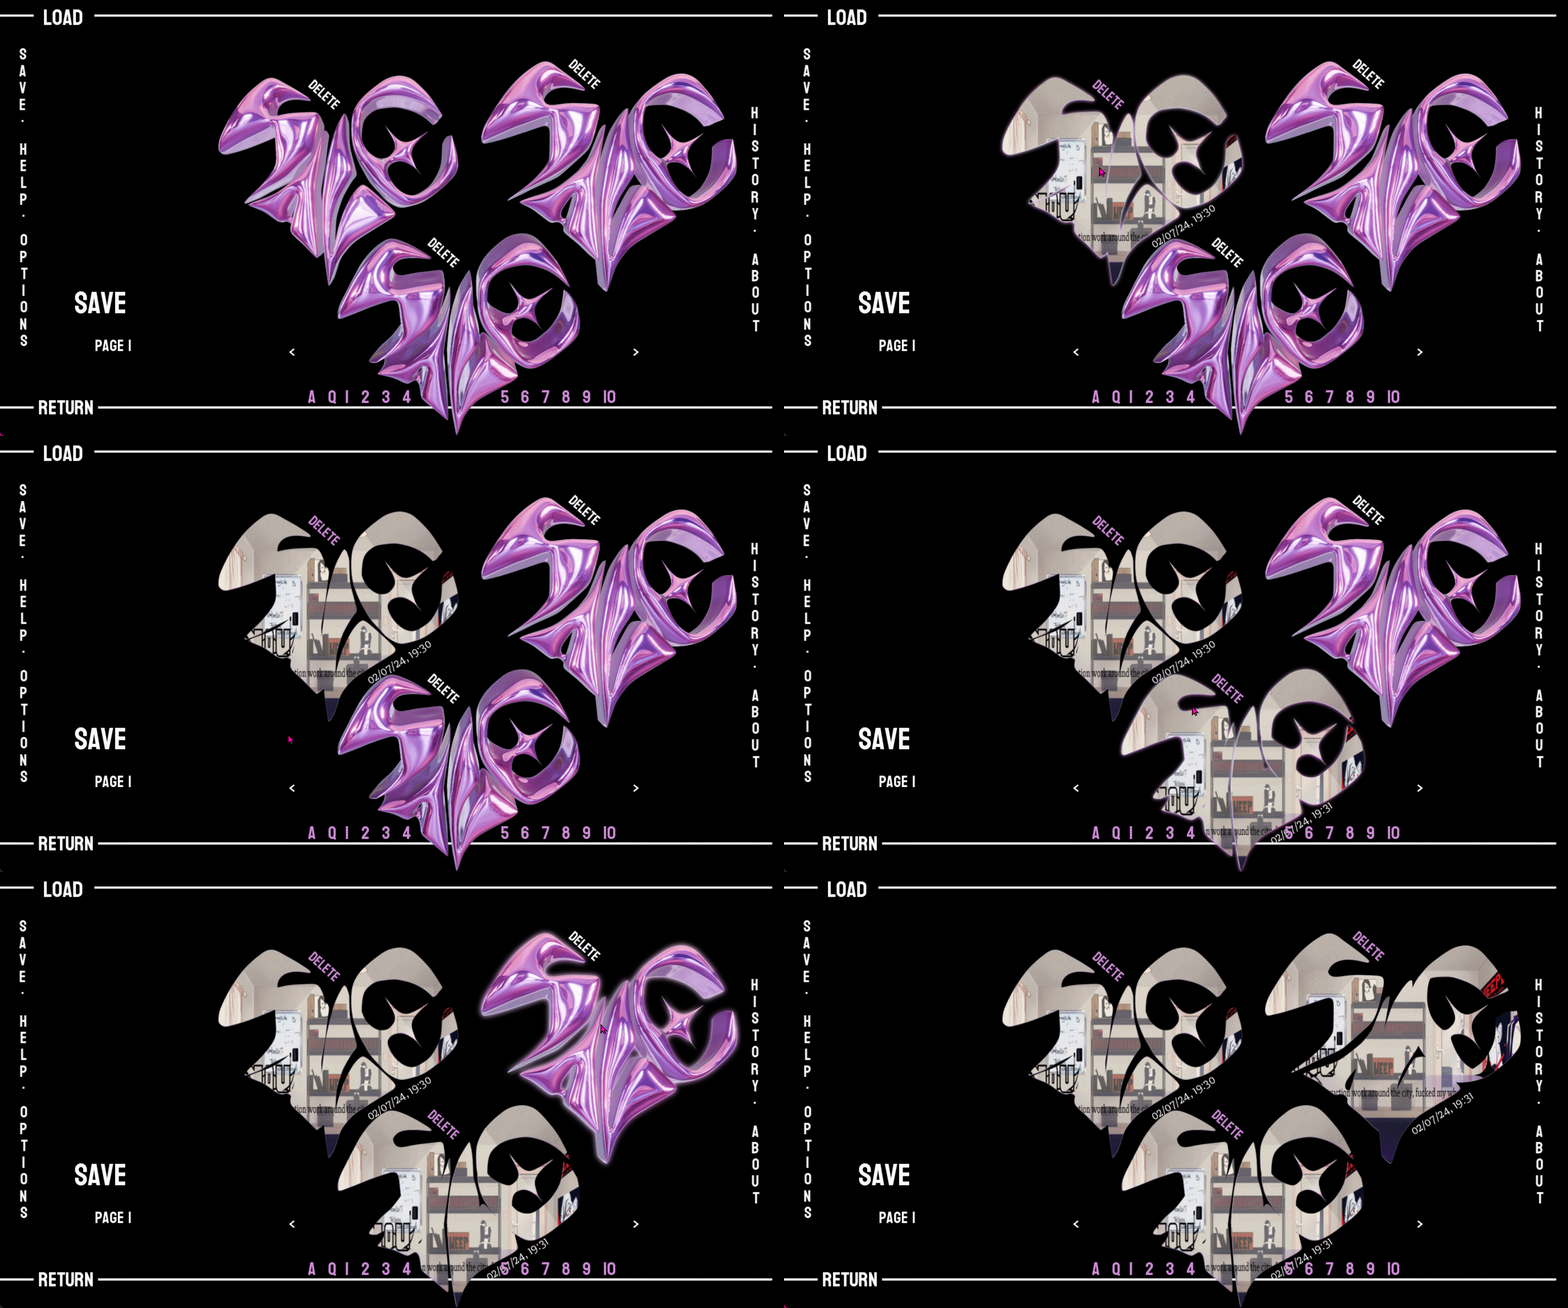
A preview of my "imagebutton" in action from my recent game "The Succubus Won't Fuck Me".
The images you'll need
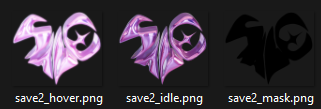
- The idle state of the button
- The hovered state of the button (it will not appear on top of the idle image, so I went for a glow/shine that appears around the button)
- The mask, the shape the screenshot will take.
These images can be placed anywhere inside your game folder, but I'd recommend the GUI folder for this tutorial.
Here is the code
In screens.rpy look for the screen save(): Now just above it place this code:
default empty_save = Image("gui/save_idle.png")
Now depending on whether all your buttons are identical, you will only need one. But if like me, you have various sized buttons you'll need to do something like this:
default empty_save1 = Image("gui/save1_idle.png")
default empty_save2 = Image("gui/save2_idle.png")
default empty_save3 = Image("gui/save3_idle.png")
This will be properly explained later, but it is necessary to have one for each unique button.
Now a few lines below you'll find screen file_slots(title): , and here are the lines of code I added
I only have 3 hearts per page so my range is set to 3. Feel free to adjust this number depending on how many you will need:
for i in range(3):
    $ slot = i+1
The button, the pos sets its position on the screen and the xsize and ysize set it's width and height respectively:
button: ### First Heart
    pos (205, 130)
    xsize 650
    ysize 940
The focus_mask makes sure that transparents pixels are ignored when the mouse hovers over the area of the button
focus_mask True
idle_background "gui/save2_idle.png"
hover_background "gui/save2_hover.png"
The backgrounds states when the mouse is either not on the button or hovering over the button.
The action that Ren'py does with this File. In this case sets it as the 3 File on the page. It can be any number or simply (slots), if you only have one unique shaped button.
action FileAction(2)

add AlphaMask(FileScreenshot(2, empty=empty_heart3), "gui/save2_mask.png") xoffset -6 yoffset -7
The real meat and potato of this tutorial!
Let's break it down even more:
• add AlphaMask()
AlphaMask is a displayable, I recommend reading the documentation on it as it will provide a better explanation than I could. But in short where the mask is opaque so will the AlphaMask be and wherever it is transparent so will the AlphaMask be.
• add AlphaMask(FileScreenshot())
FileScreenshot returns a screenshot of the specified File
• add AlphaMask(FileScreenshot(2, empty=empty_heart2))
Specifies the File for the screenshot and adds an empty parameter to the screenshot.
• add AlphaMask(FileScreenshot(2, empty=empty_heart2), "gui/save2_mask.png")
The mask for the button, where the screenshot will take place.
• add AlphaMask(FileScreenshot(2, empty=empty_heart2), "gui/save2_mask.png") xoffset -6 yoffset -7
And finally a few more style properties to get the mask above the button just right!
An overview of my code in screenshot: (i'm having a bit of diffculty with itch.io code formatting, so please use this as reference. I will also try to move this tutorial to the lemmasoftforums.)
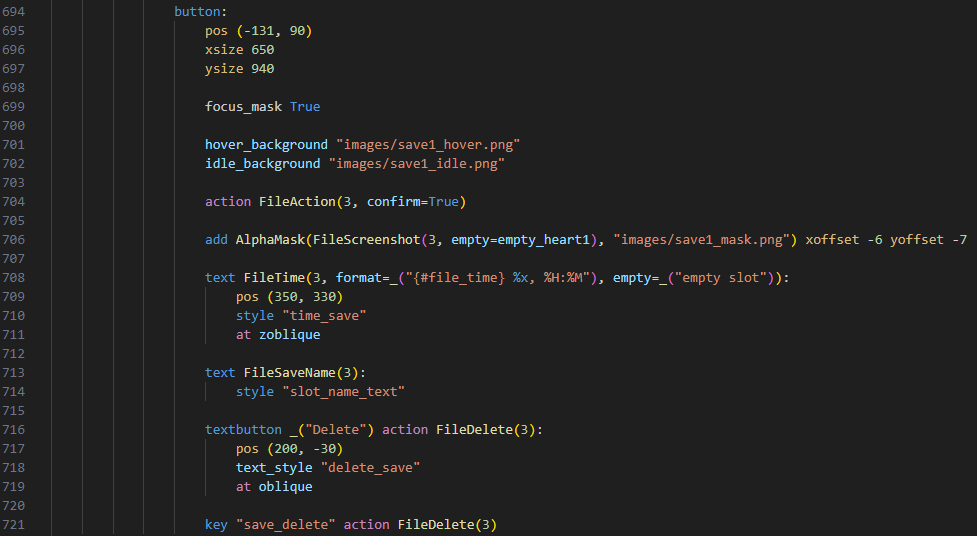
If you only have one unique imagebutton, I'd recommend checking out this post: https://lemmasoft.renai.us/forums/viewtopic.php?f=8&t=26385
Now you should have your very own imagebutton save/load slots! Yay!
Here is a handy website for all the time code format: https://help.gnome.org/users/gthumb/stable/gthumb-date-formats.html.en
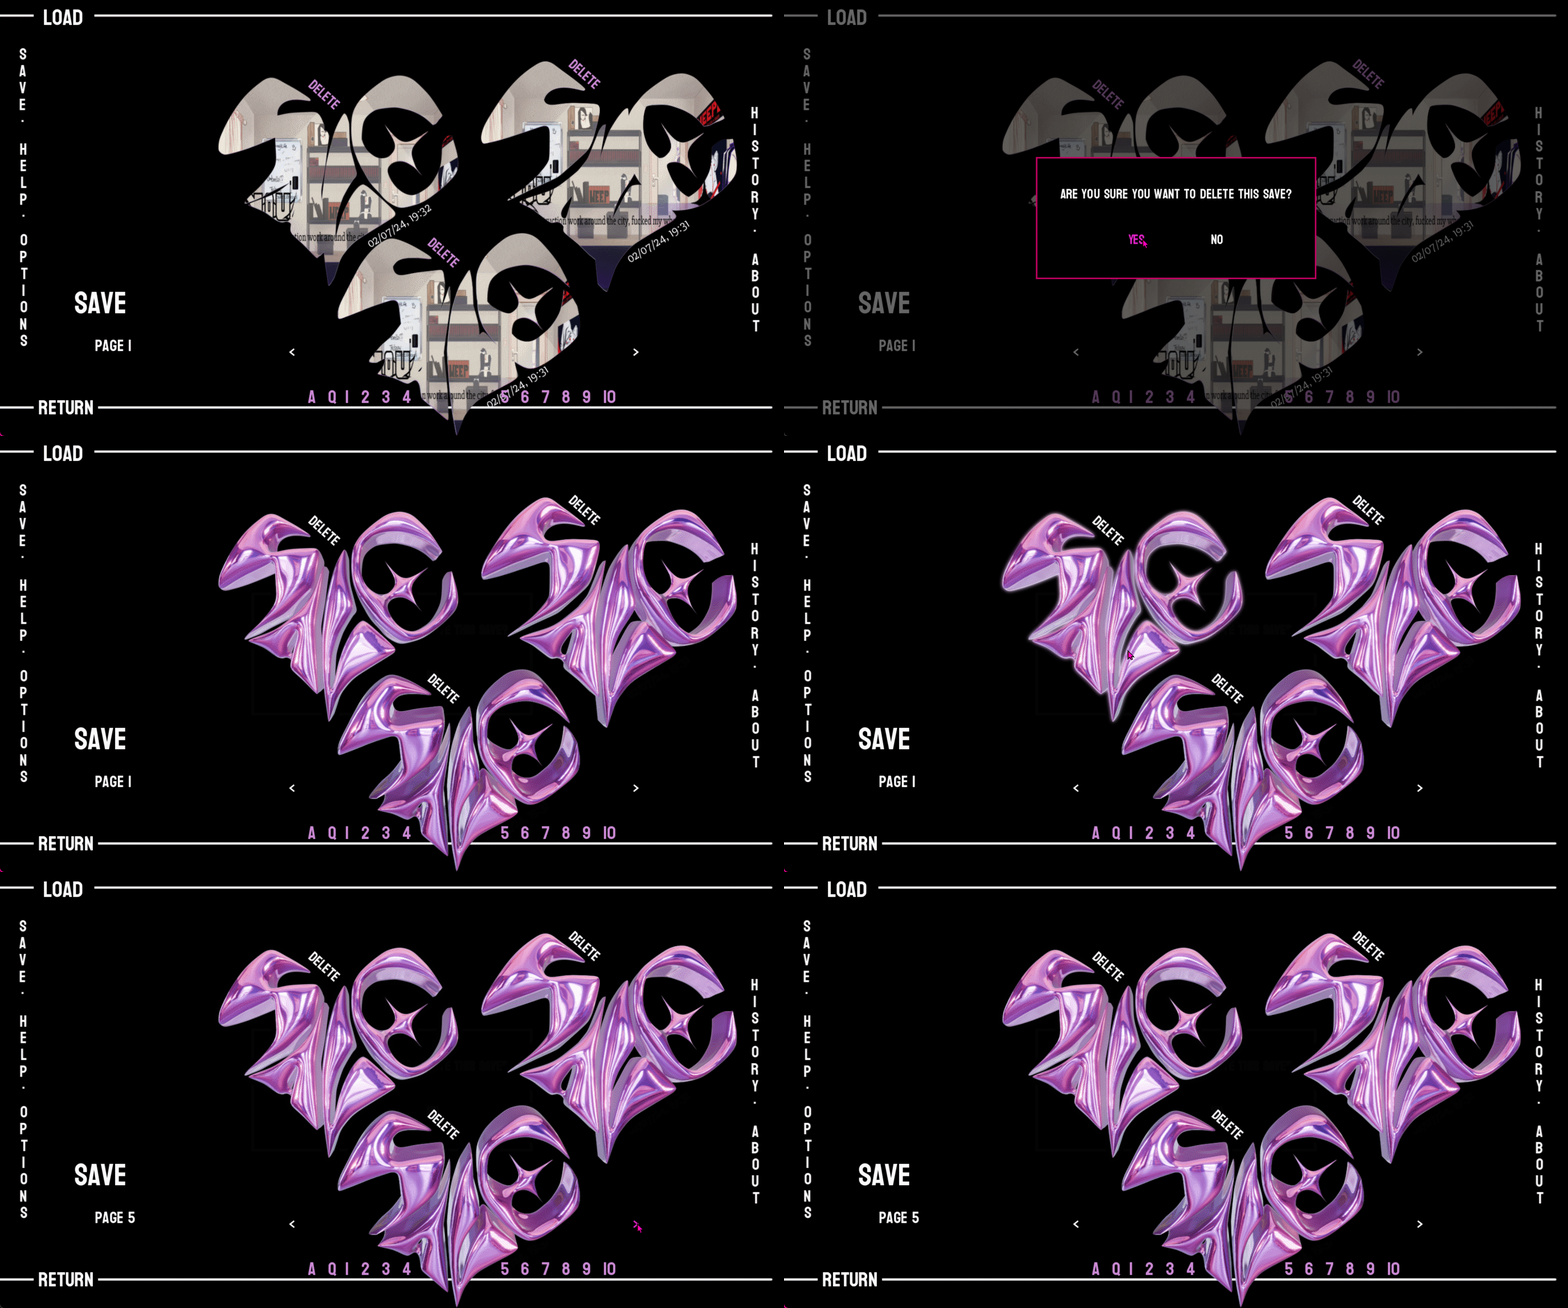
Deleting a save
textbutton _("Delete") action FileDelete(2):
The action FileDelete does as it is named and easily deletes the specified File. It will show a prompt to the user before deleting the File.
Final words
All in all I am quite satisfied with the outcome of the screen and buttons. My first time playing around with styles too, learned quite a bit! I do wish to fix the screenshot sizing. If there are any errors in this tutorial please do let me know!
There is no need for credit me, but do let me know if this tutorial was useful to you!
Please have a good remainder of your day and Happy coding!
Posts that helped me create the button:
https://lemmasoft.renai.us/forums/viewtopic.php?f=8&t=26385
https://lemmasoft.renai.us/forums/viewtopic.php?p=366508&hilit=screenshot+mask#p...
Get The Succubus Won't Fuck Me
The Succubus Won't Fuck Me
She really won't!
| Status | Released |
| Author | piinkpuddiin |
| Genre | Visual Novel |
| Tags | Casual, LGBT, Queer |
| Languages | English |
More posts
- First logJan 31, 2024
Leave a comment
Log in with itch.io to leave a comment.